Present live camera feed in PowerPoint slides over Teams or Zoom
Create amazing presentations where you can put yourself inside the presentation great for remote first jobs

STREAM Camera in PowerPoint
Necessary software to install
OBS
Install OBS from here: Obs download link
OBS websocket server
For websocket server, you can find the file by scrolling all the way down, Install OBS websocket server plugin from here: Obs websocket server github releases.

Download the installer that matches your OS, or unzip the contents of the ZIP file into the folder where you installed OBS (C:\OBSINSTALLPATH\obsstudio). I recommend closing OBS before installing or unzipping the websocket server. Once installed, open OBS again, in the top menu click on Tools -> WebSockets Server Settings. It should look like this:
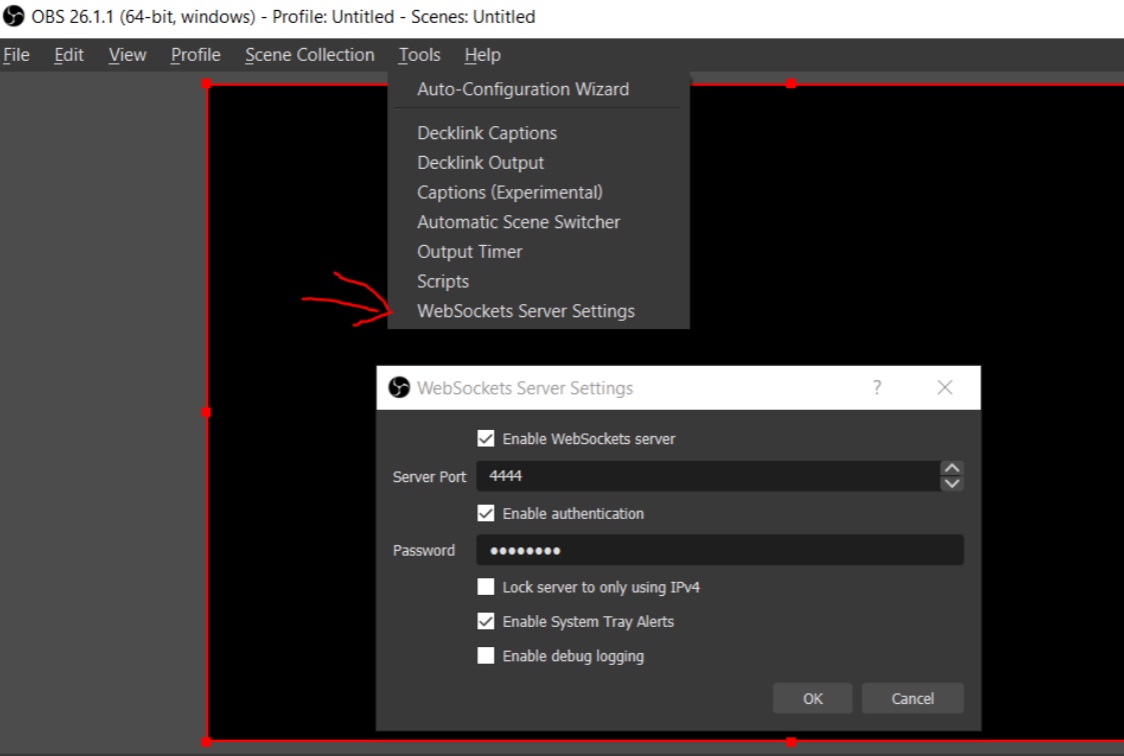
Enable authentication and set a password you can remember and type later. We will need to input the password we set here in the PowerPoint OBS scene Switcher.
We need the webserver extension to change the OBS scenes when we change our PowerPoint slides.
PowerPoint OBS Scene Switcher
Clone or download the scene switcher code. I have included a built version of the program you can just run in the Compiled Executable folder. Otherwise you will need visual studio 2019 or newer to build and run the code.
Setup
Video resolution
In the lower right side of the screen there is a Settings button, click it and it should show an option popup. Click on the Video tab in the popup window. Set Base (canvas) Resolution and Output (Scaled) Resolution to 1920x1080.
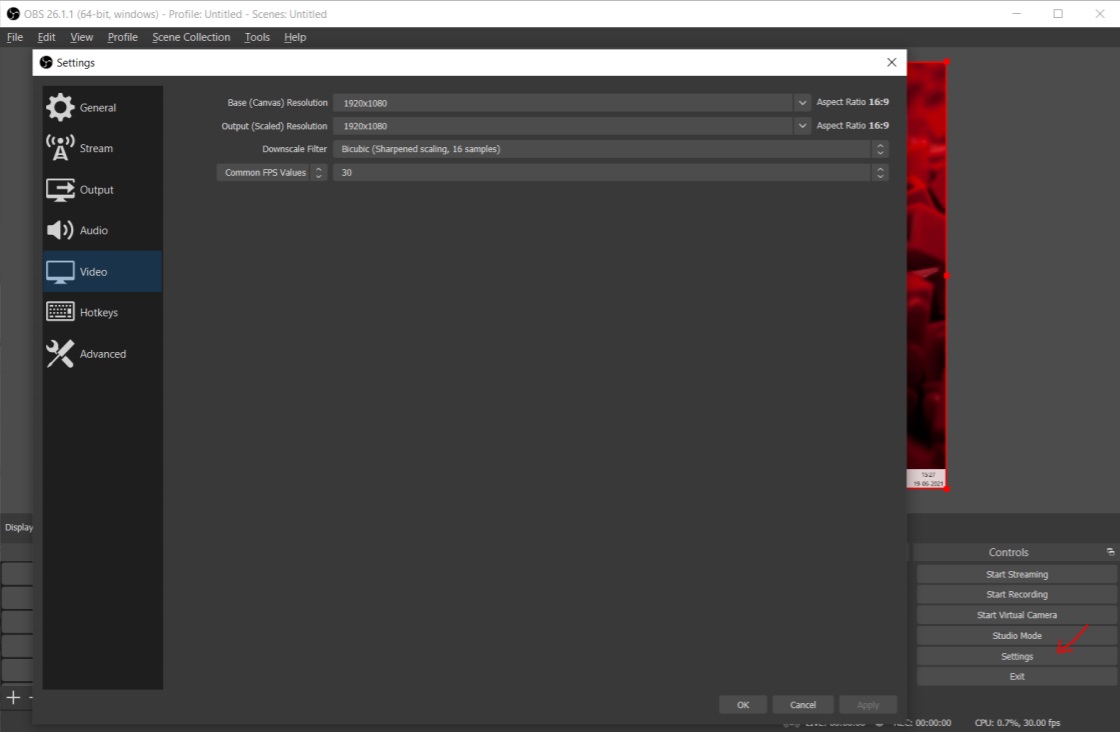
I picked 1920x1080 as a resolution because it is the largest audience who has this screen format. It also scales well to 720p or 1440p screens. For all the other high end devices, they probably run on a higher resolution that can comfortably view the stream at 1080p.
Obs Scenes
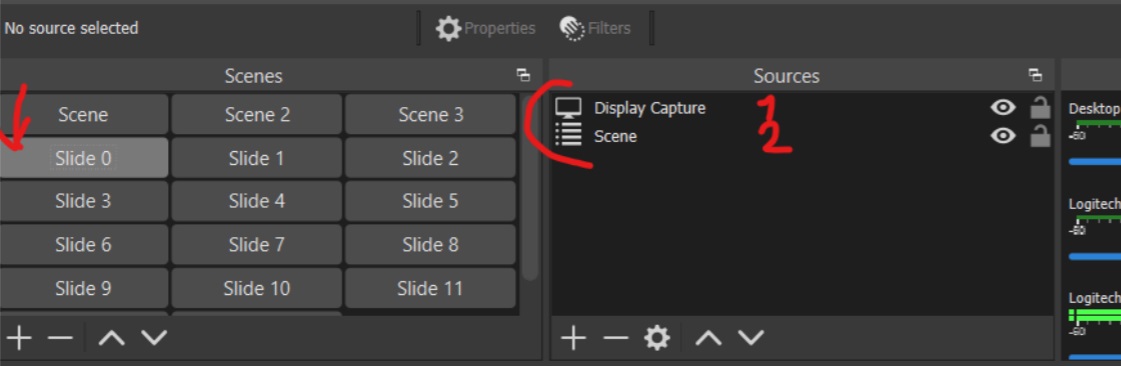
After you install OBS, by default it will have 3 scenes, I chose the first “Scene” as the “base scene” where I’ve added my microphone and camera as sources. We will use this scene with all of our slides, as it is simply the camera and microphone.
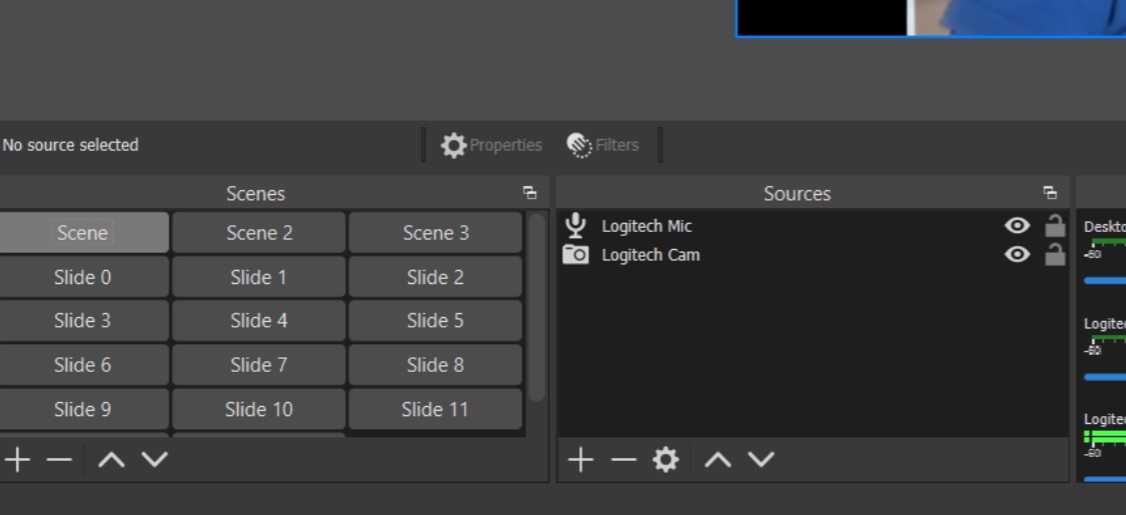
As you can see in the image below, I’ve added Scene and Display Capture, as input sources. We will need to do this for every slide where our green screen changes. Let’s being by creating a Scene and name it Slide 0. Under sources click the “+” button and select Scene as a source.
Now we need to set a chroma filter for our display capture, this will allow the layer beneath the top layer, in this case our “Scene” layer will be shown in places where we have the right color green.
- Right click the “Display Capture” source.
- Click on Filters.
- In the popup settings window select the Chroma key effect filter, if it’s missing add it from the ‘+’ sign under Effect Filters.
- Set the Key Color Type to Green and use a Similarity value of 360.
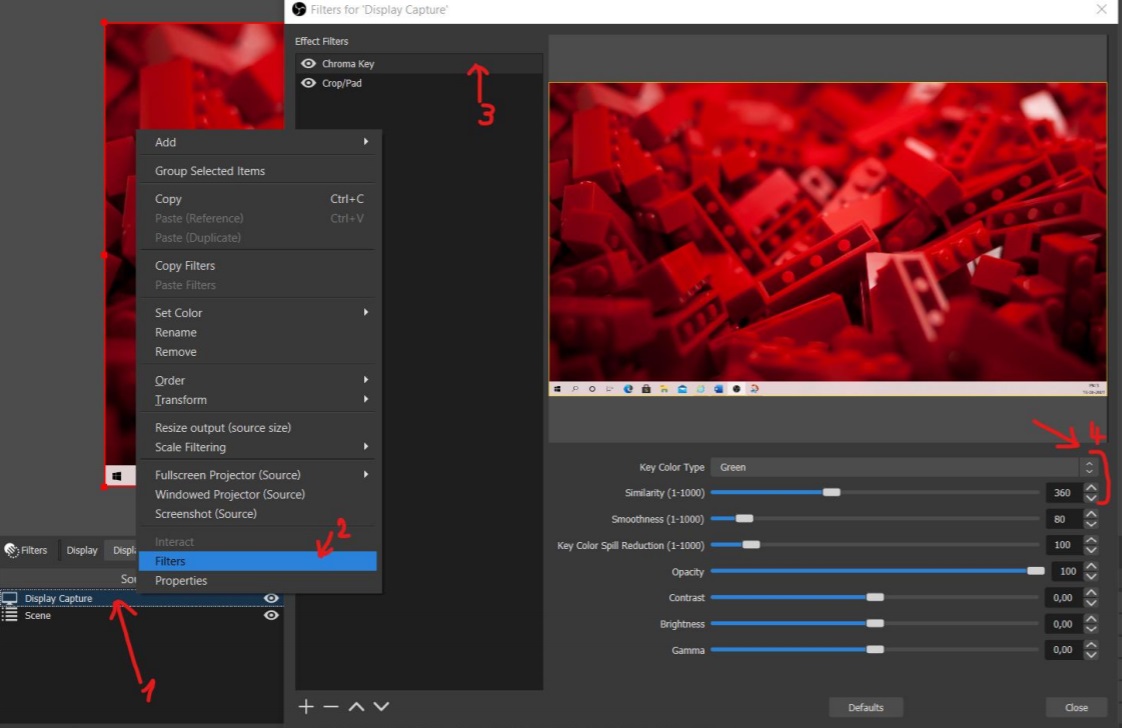
Now that we have our Scenes settings in order, make sure that both the scene and the Display Capture are full screen on the preview canvas. In my case I see the desktop of the display capture surrounded by a red square which is the base “Scene” that contains the camera and microphone input.
With these 2 layers, in order OBS will now make the color green of our display capture “transparent” so our 2nd layer can be seen through the green.
PowerPoint Slides
In our PowerPoint slides we simply put green wherever we want to appear, for example the images below are my first two slides. There is a slide from the left side animation on my name card to make it look more modern and integrated.
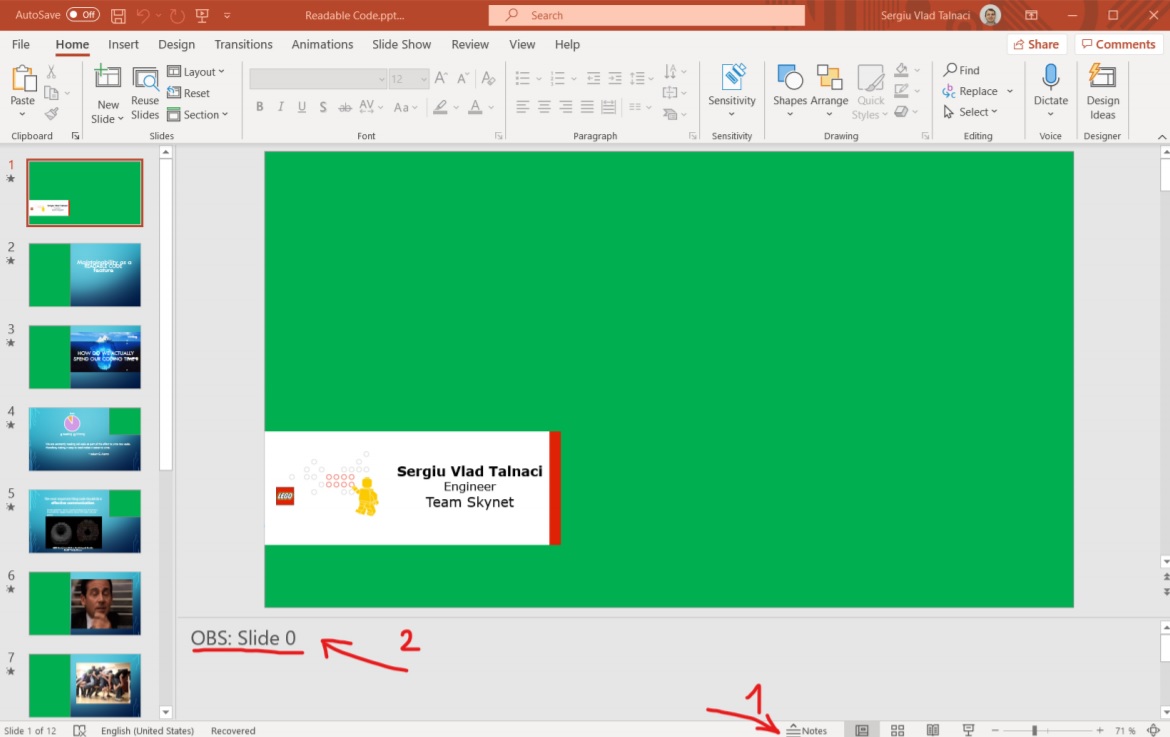
Another important sidenote, in PowerPoint remember to add OBS: “Your_scene_name” as the first text in the presenter notes. In the example above we have a Scene in OBS called Slide 0, so we write “OBS: Slide 0” in the presenter notes for slide 1. Sorry about the 0 instead of 1, computer people always start from 0.
If you don’t know about presenter notes, follow the image above.
- Click on the show presenter notes button in the bottom right.
- Write OBS: Scene_name on the first line.
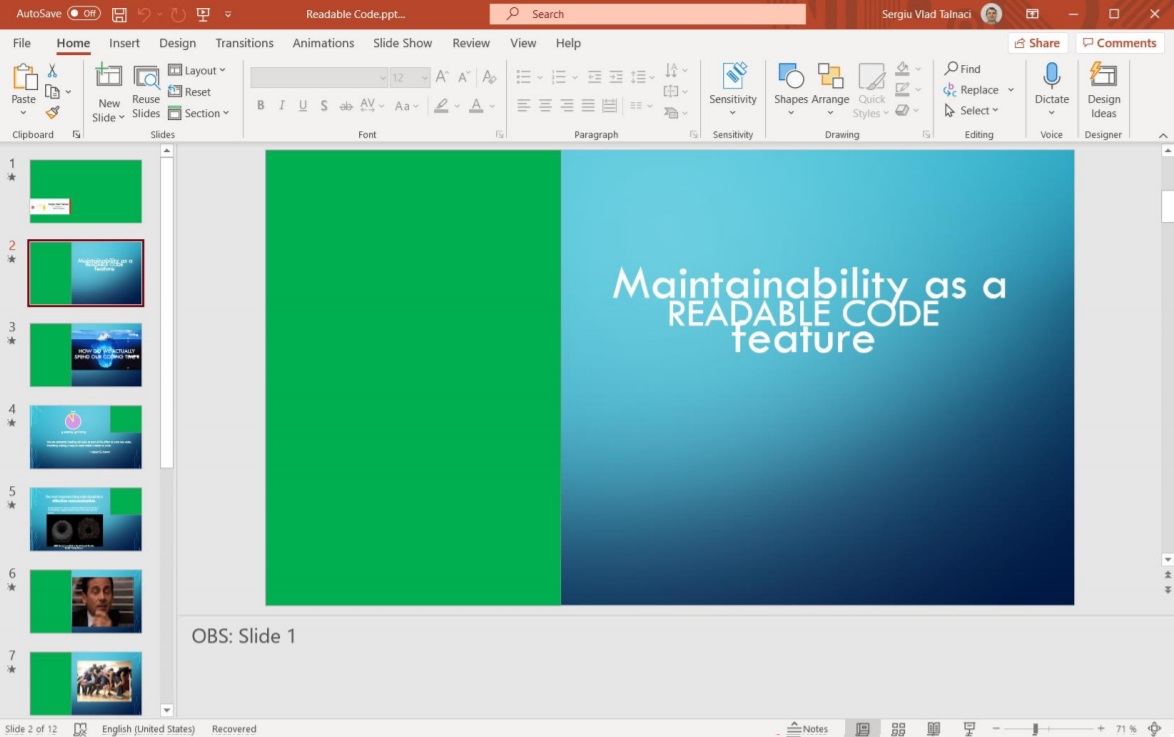
The image above is the second slide where we write OBS: Slide 1, to match the second scene we have in OBS. The easiest way is to make an OBS scene from every slide, but you can also reuse them if the green screen location does not change.
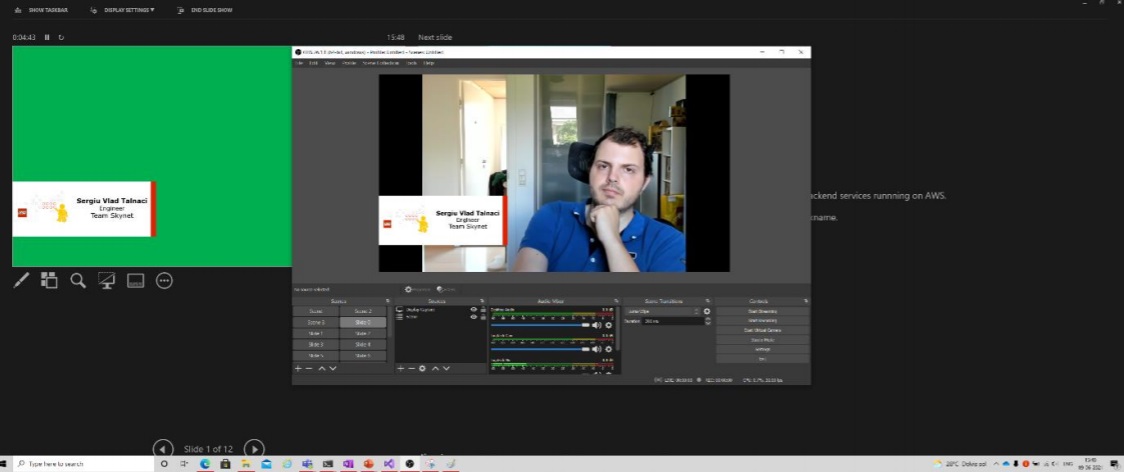
END RESULT
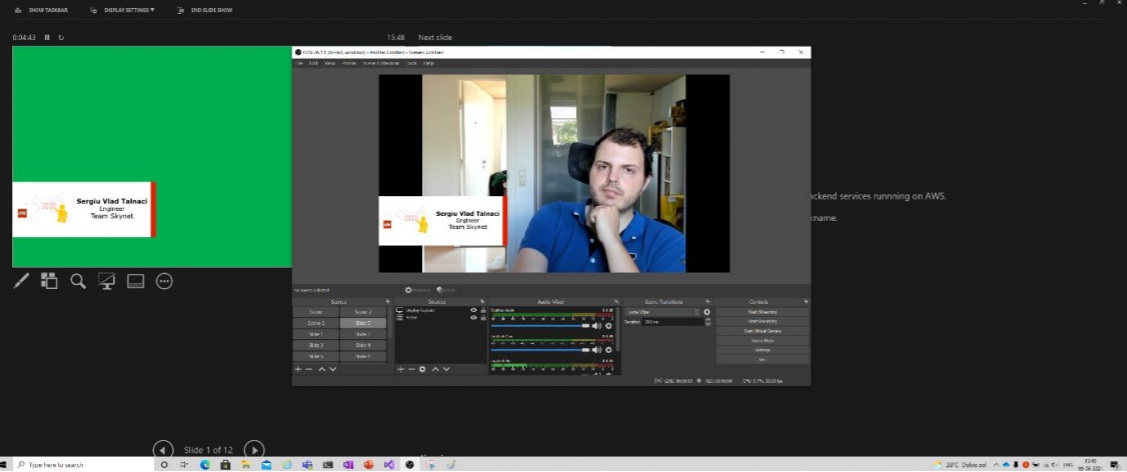
The image below is how it looks like on OBS in my “Slide 0” scene. As you can see the non green part of the screen is on top of my camera input, or in other words, everything that is screen becomes transparent on the “Display Capture” source so we can see the scene “Scene” which is the Camera and Sound Capture.
Center yourself to the side of the screen
In this slide I want to place myself to the left side of the screen. To do this I made the PowerPoint slide with a large green block on the left side. I’ve also added “Slide 2” in the presenter comments of this PowerPoint slide. Now we need to setup “Slide 2” scene in OBS.

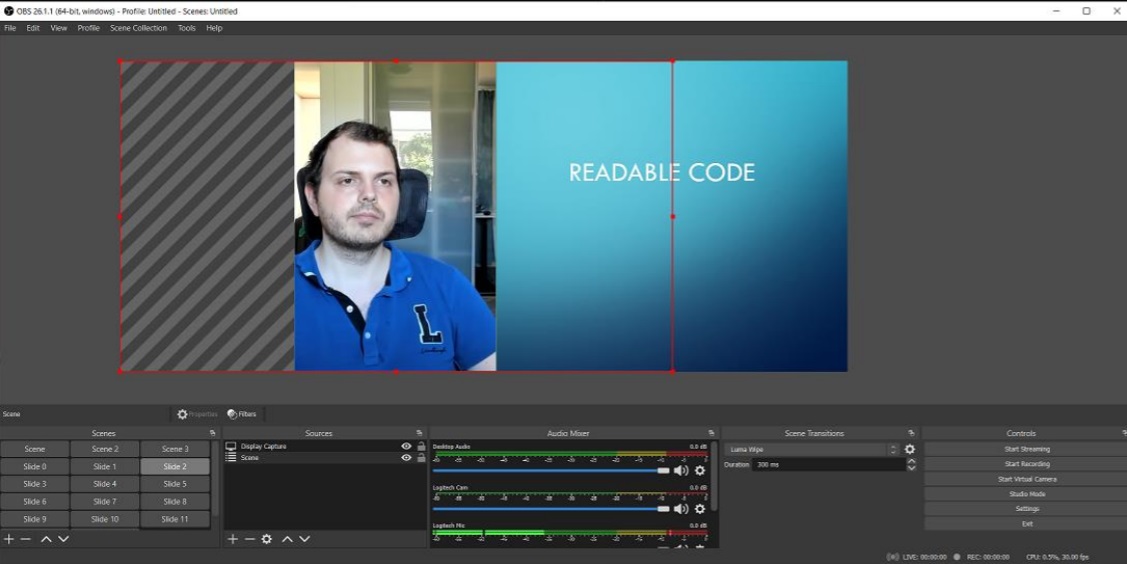
As usual we use the Display Capture Source and Scene source, if you look in the image above, I dragged the input scene nammed “Scene” with my mouse to the left. You can see the “Scene source” is moved to the left, so much left that the left part of it is out of the canvas and won’t be seen or rendered. However this allows us to be in the center of “Scene” while being on the left side of the Powerpoint screen.
OBS PowerPoint scene switcher
Once we have our PowerPoint slides prepared with the green screen and the correct text in the presenter notes we have to run the OBS PowerPoint scene switcher software.
If you haven’t already downloaded it, you can get it here: PowerPointObsSceneSwitcher.
If you want to modify and build the code yourself, you need Visual Studio 2019, otherwise just run the built code from the Compiled Executable folder.
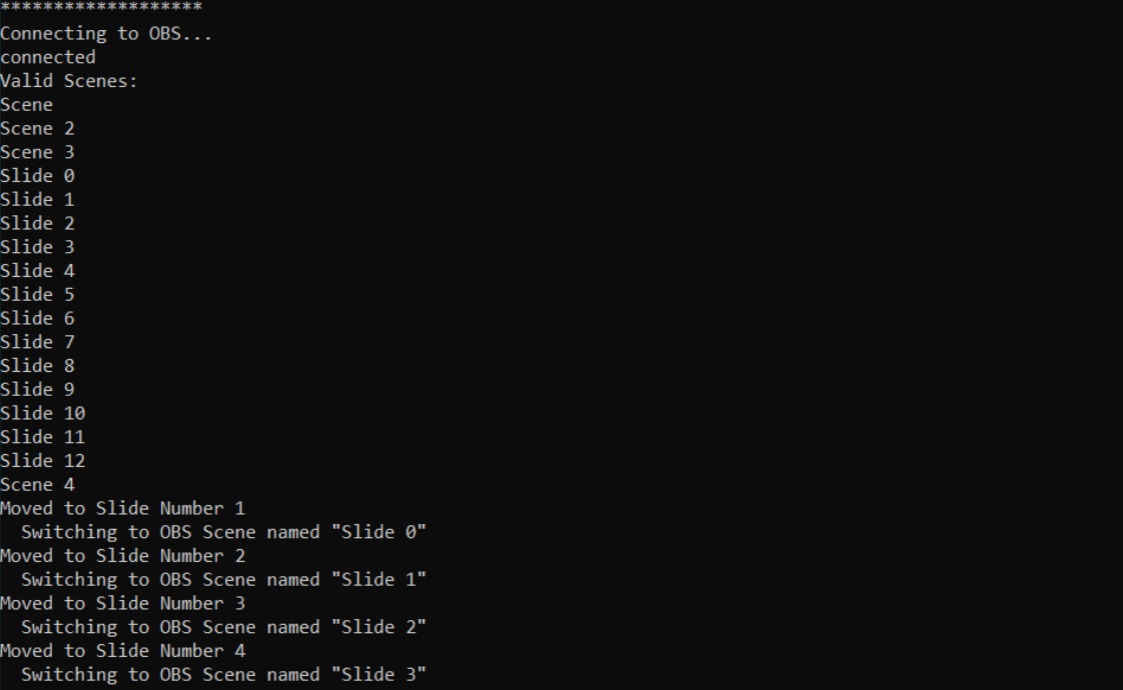
Once you run it will ask you for a password. This is the password we previously set on the OBS PowerPoint scene switcher. If the password is correct, you can see it writes the OBS Scenes.
Try to start presenting in PowerPoint and switch between the slides. If the program works you can see yourself in OBS and in the switcher you can see Moving to Slide Number X Switching to OBS Scene named “SceneName”.
Big thank you to Jeff Fritz, Scott Hanselman and the community for this software.
Present in Microsoft Teams
There are two ways to present our slides in Microsoft teams
- Virtual camera
- Share screen preview
Virtual camera
In virtual camera mode, OBS preview becomes the camera stream. This is the easiest way to stream, but it might not succeed at grabbing the attention of your entire audience. In Microsoft Teams, before joining the meeting, make sure you select the OBS Virtual Camera like in the image below.

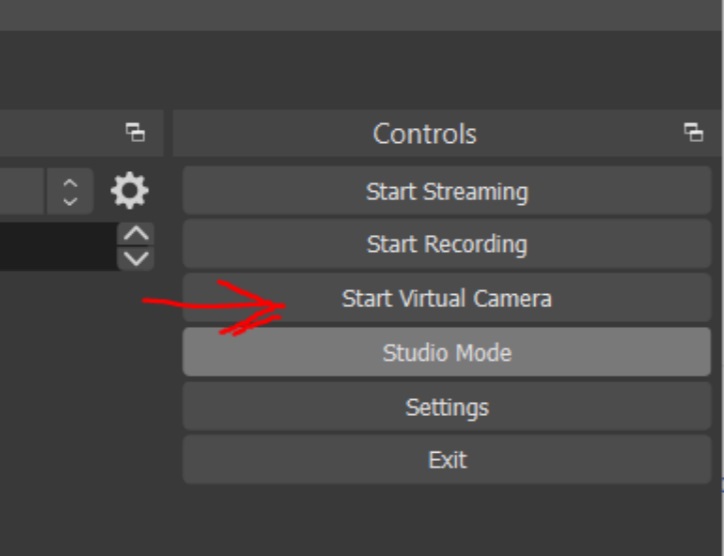
In OBS make sure you click on the Start Virtual Camera button in the bottom right of OBS. Now you should be able to see your OBS preview in Microsoft Teams.
Join the meeting and start your presentation, make sure to remember to right click your portrait and Spotlight yourself.
Screen share
This mode is great if you have 2 screens, it might be a tad more challenging to set up with only 1 screen. The image below displays how it should look if everything is set up correctly.
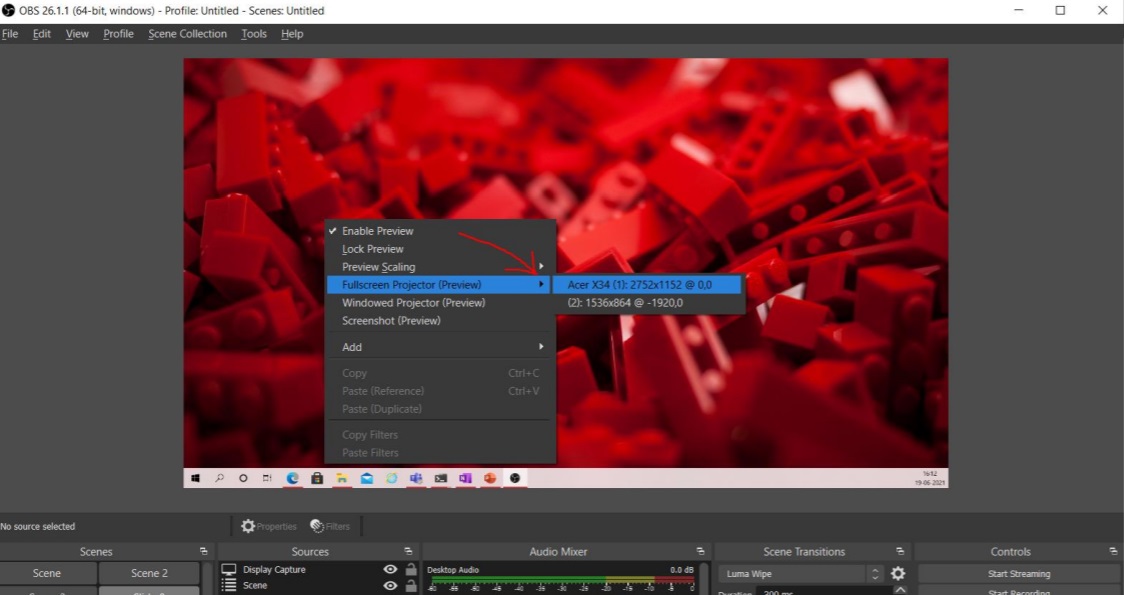
Start presenter mode in PowerPoint, switch to OBS. In OBS right click on the preview window, select Fullscreen Projector (Preview) -> Select the monitor you wish to fullscreen to. I use a 1920x1080 monitor since it’s one of the most commonly encountered monitor resolution. This will create a fullscreen preview on the selected screen. You can Alt-Tab out of it and even minimize it.
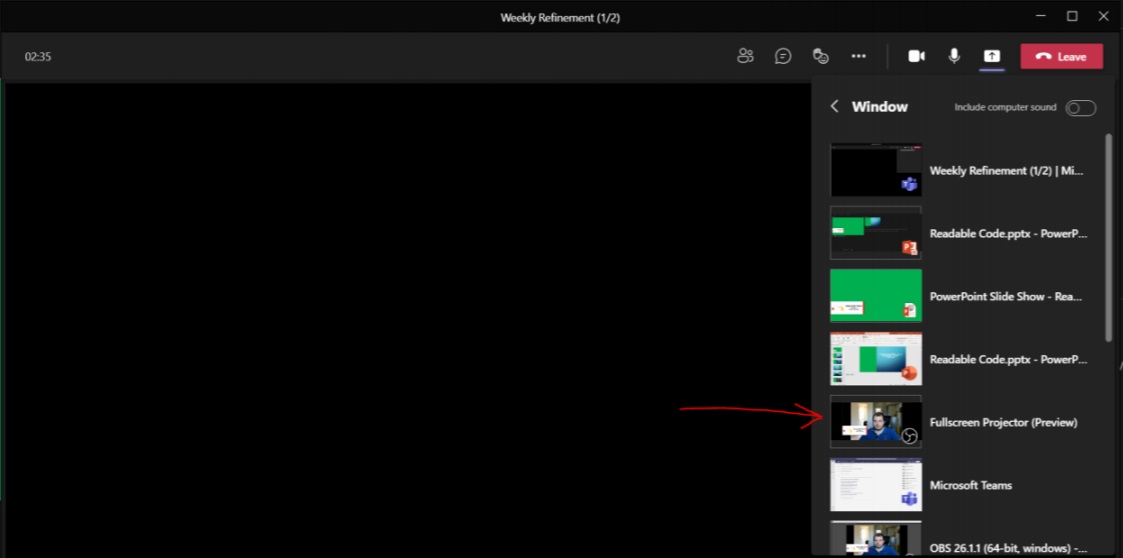
In Microsoft teams, click on the Share content button, click on “Window”, and find the Full Screen Projector (Preview). Now you should be good to go, make sure to check with a friend that everything works before presenting to a larger audience.
This method has a minor downside, we have to stop the camera in obs or just exit obs after our presentation ends. We have to do this to free up the camera so Microsoft Teams can use it again.